Clarke Tech Editor Studio 39 Instant
: Open the backup file in Editor Studio on your PC to rearrange channels and clean up unwanted transponders.
Standard .sdx (SatcoDX) and CSV data processing.
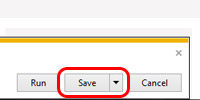
: Save the modified file in the format compatible with your specific hardware (e.g., Clarke Tech , Formuler , or Enigma2 ).
Save the newly structured channel list back to your FAT32 USB flash drive. Plug the USB drive back into your receiver.
Getting started with Clarke Tech Editor Studio 3.9 is straightforward, but following the correct workflow ensures you do not accidentally corrupt your receiver’s memory. Step 1: Backing Up Your Current Settings clarke tech editor studio 39
Save the file back to your USB drive (ensure you maintain the exact file name convention required by your box).
You can find older versions and manual guides on platforms like
: Clean up dead channels or update transponder data following satellite frequency changes.
Using the software typically involves a few straightforward steps: : Open the backup file in Editor Studio
This public link is valid for 7 days and shares a thread, including any personal information you added. This link or copies made by others cannot be deleted. If you share with third parties, their policies apply. Can’t copy the link right now. Try again later.
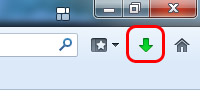
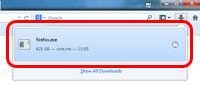
Export the settings file from your receiver onto a USB drive, plug it into your PC, and select File > Open in the software.
Before firing up the software on your PC, you must extract your current channel data. Insert a FAT32-formatted USB stick into your receiver.
The software allows users to organize their satellite television experience on a PC rather than using the receiver's remote control. It is commonly used to: Save the newly structured channel list back to
(often abbreviated as C-Tech Editor ) is a specialized Windows-based channel management utility designed to organize and edit channel lists for digital satellite receivers. Primary Function
To my left, the —a magnetic strip holding the corpses of seventeen devices that died for a story. There’s a smart ring that overheated so badly it left a blister shaped like a button. A foldable phone whose screen developed a crease that looked like a frown. And my personal nemesis: a flagship e-reader with a "sunlight-visible" display that became a mirror the second you stepped outside. Each one has a small yellow sticky note: Date of death. Cause. Verdict.
Once the transfer is complete, safely remove the USB drive and plug it into your Windows PC. Step 2: Navigating the Interface
Save your finalized list. If you are using a modern decoder (like a Formuler), export it to the required format (like C-TECH HD265).
Send source files via secure upload portal (up to 50GB per project). After a brief style intake form, the Clarke Tech team delivers a rough cut within 48 hours, followed by two revision rounds included in the base rate.